DIY Dryer Vent Cleaner SOS: Save Money, Clean Better!
DIY Dryer Vent Cleaner: A Comprehensive Guide to Efficient and Safe Appliance Use
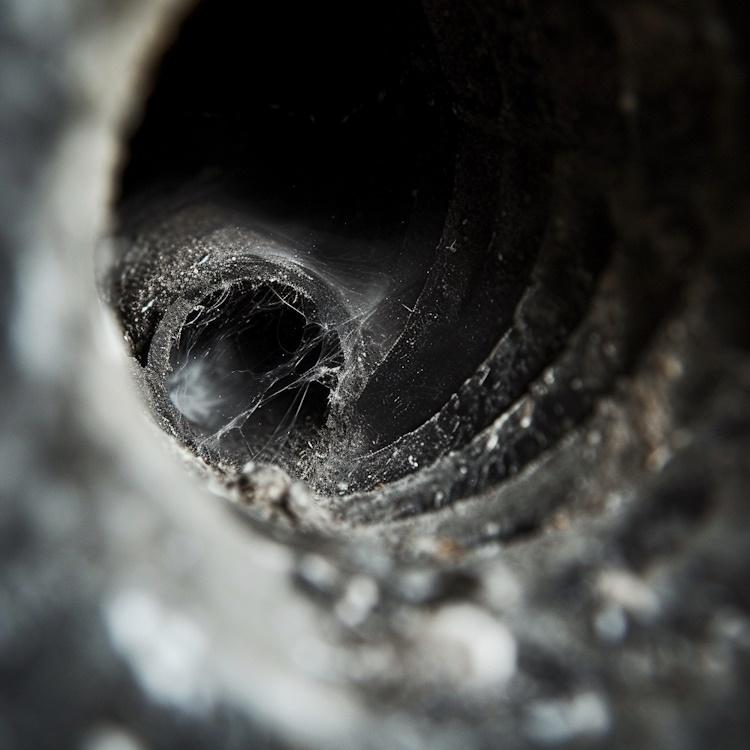
A clean dryer vent can prevent fires and boost appliance efficiency.
Is your clothes dryer taking longer to dry a load than it used to? A clogged vent could be the culprit. This guide is packed with essential tips and easy-to-follow steps for cleaning your dryer vent like a pro, ensuring your appliance runs efficiently and safely.
Dive in for peace of mind!
Key Steps for DIY Dryer Vent Cleaner
- Clean your dryer vent once a year to prevent fires and keep the appliance efficient.
- Watch for signs like clothes taking longer to dry, a humid laundry room, or a burning smell as clues that it’s time to clean.
- Disconnect power and gas before cleaning, then vacuum and brush out lint from both inside and outside of the vent.
- Make your own sweep with paper tubes or use vinegar mixed with water as natural cleaning agents.
- Keep the lint trap clean after every load and check around the dryer for extra lint that could cause problems.
The Importance of Regular DIY Dryer Vent Cleaning
Cleaning your dryer vent is crucial to prevent potential fire hazards. Signs that it’s time to clean your dryer vent include longer drying times and a burning smell during operation.
It’s recommended to clean your dryer vent at least once a year to ensure safety and efficiency.
When to Perform a DIY Dryer Vent Cleaning: Key Signs
Your dryer works hard to keep your clothes dry. It’s important to clean the vent to keep it running safely and efficiently. Here are signs that it’s time for a DIY dryer vent cleaning:
- Clothes take longer to dry than they used to.
- After a drying cycle, clothes are unusually hot.
- The laundry room feels more humid when you run the dryer.
- You find lint around the door seal or the outside vent opening.
- There’s a burning smell coming from your dryer.
How Often Should You Clean Your Dryer Vent?
Learning how to clean a dryer vent can make laundry day more efficient and reduce the risk of fire hazards.
Regular dryer vent cleaning is crucial for preventing fire hazards and maintaining appliance efficiency. It is recommended to clean the dryer vent at least once a year, or more frequently if there are signs of blockage.
Keeping a routine for cleaning the vent helps reduce the risk of lint buildup, improving air circulation, and safeguarding against potential fires caused by clogged vents. By adhering to a regular schedule for cleaning your dryer vent, you can ensure that your appliance operates safely and effectively.
It’s critical to understand that establishing a consistent frequency for cleaning your dryer vent is essential in minimizing fire risks and ensuring optimal performance. Regular maintenance can help in removing any obstructions from the ducts and reducing lint accumulation, thereby promoting safer operation and prolonging the lifespan of your appliance.
Sealegend 2 Pieces Dryer Vent Cleaner Kit (wherecanibuythat.us)
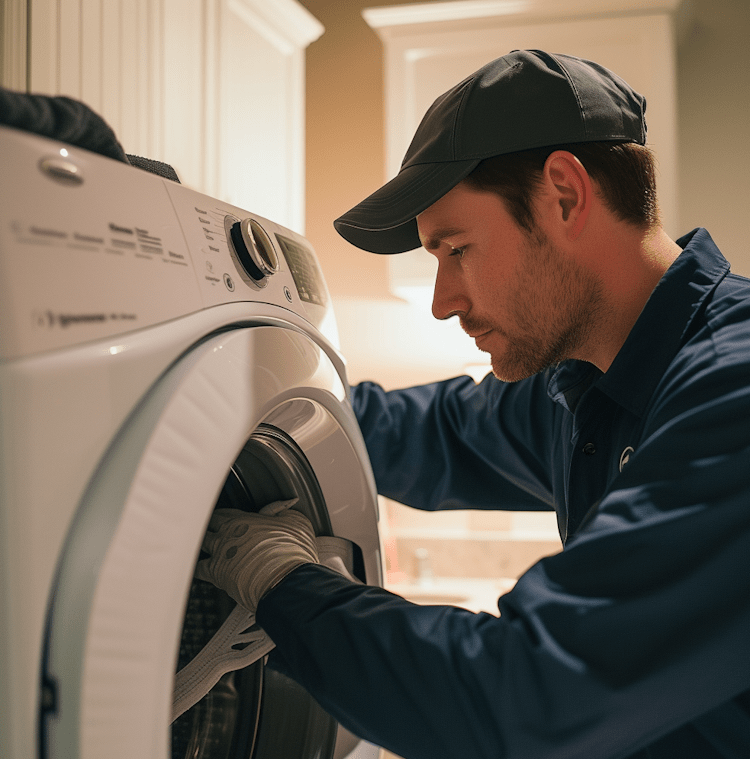
Comprehensive Steps to DIY Dryer Vent Cleaning
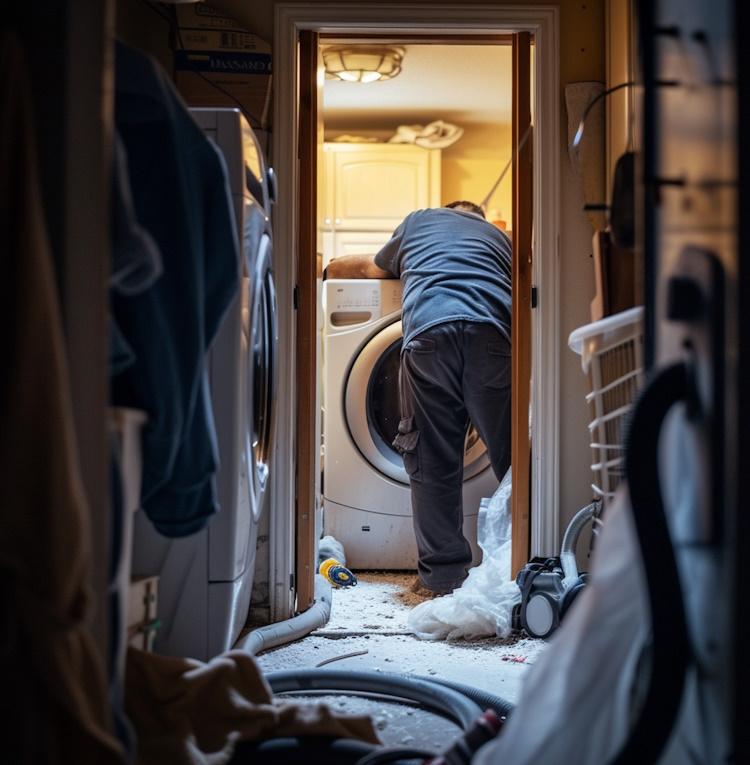
Disconnect the dryer from the power source and remove the vent from the back of the dryer. Use a vacuum to clear out any lint, then use a vent brush to scrub away stubborn buildup.
Once clean, reattach the vent and plug in your dryer to prevent future lint buildup.
Safety First: Disconnecting the Dryer for Vent Cleaning
To disconnect the dryer, follow these steps:
- Unplug the dryer from the power outlet to ensure safety.
- Turn off the gas supply if your dryer is gas-powered to prevent leaks.
- Pull the dryer away from the wall, giving you ample space to access the vent.
- Loosen the clamp connecting the vent hose to the dryer using a screwdriver or pliers.
- Gently pull the vent hose off of the dryer’s exhaust port, taking care not to damage it.
- Place a towel or rag under the hose connection to catch any lint or debris that may fall out.
Thoroughly Vacuuming the Dryer Vent: A Key Step in DIY Cleaning
To clean the dryer vent thoroughly, use a vacuum to remove lint and debris.
- Use a vacuum with a long, flexible hose attachment to reach inside the vent.
- Gently insert the hose into the vent, ensuring it reaches as far as possible.
- Move the hose back and forth to dislodge and suction out any accumulated lint and dirt.
- Pay special attention to the corners and bends of the vent as these areas tend to accumulate more debris.
- Thoroughly vacuum both the interior and exterior sections of the vent to ensure all particles are removed.
- Check for any signs of blockages or stubborn buildup, and continue vacuuming until the vent is completely clean.
Final Step in DIY Dryer Vent Cleaning: Thoroughly Brushing Out the Vent
To clean a dryer vent, brushing out the vent is an important step in ensuring thorough maintenance and preventing fire hazards.
- Use a dryer vent brush with flexible bristles to loosen and remove lint and debris from the vent walls.
- Insert the brush into the vent opening, gently pushing it through to break up any clogs or blockages.
- Rotate the brush while feeding it further into the vent to ensure all sides are effectively cleaned.
- Pull the brush out carefully, capturing dislodged lint and debris as you go.
- Repeat the brushing process if necessary, especially if there’s a significant buildup of lint.
Safely Reconnecting the Dryer After Vent Cleaning
To ensure safe operation of the dryer after cleaning, follow these steps:
- Gently slide the dryer back into place, avoiding any kinks or bends in the vent hose that could restrict airflow.
- Reattach the vent hose to the back of the dryer and secure it tightly using a clamp to prevent any air leaks.
- Plug the power cord back into the outlet and make sure it is securely connected.
- Turn on the dryer and run it for a few minutes to ensure that everything is operating smoothly.
- Check for any unusual sounds or vibrations that may indicate an issue with the reconnection.
Preventing Lint Buildup: Key to DIY Dryer Vent Maintenance
To prevent lint buildup,
- Clean the lint trap after every load to ensure proper airflow and reduce the risk of fire.
- Regularly check and clean the vent cover outside to prevent debris from blocking airflow.
- Use a dryer vent cleaning kit to thoroughly remove lint and debris from the duct and vent.
- Inspect the area behind and around the dryer for lint accumulation and remove it regularly.
- Avoid using fabric softener sheets as they can leave a residue that contributes to lint buildup.
Common Questions About DIY Dryer Vent Cleaning
Wondering if you can use a homemade sweep or vinegar as a cleaning agent? Get answers to these common questions and more in this section.
Using a homemade sweep
It is important to clean the dryer vent from both the inside and outside for effective maintenance.
Create a homemade sweep by attaching an empty paper towel or toilet paper tube to your vacuum hose with duct tape. This DIY cleaning tool can effectively reach and remove lint from the dryer vent.
Regularly using this homemade sweep will help prevent lint buildup, reducing the risk of fire hazards in your home. Add this simple yet effective technique to your DIY dryer vent maintenance routine for improved safety and appliance performance.
Ensure the homemade sweep is sturdy enough to withstand thorough cleaning without collapsing during use. Regular use of the homemade sweep along with other recommended cleaning techniques will contribute to safer and more efficient laundry routines while preventing potential fire risks associated with clogged dryer vents.
Vinegar as a cleaning agent
Vinegar is a natural and effective cleaning agent for your dryer vent. It can help break down the buildup of lint and debris, which can improve ventilation and reduce fire hazards.
By combining vinegar with water in a spray bottle, you can easily apply it to the inside of the vent to loosen stubborn particles. The acidity of vinegar also helps to dissolve any grease or grime that may have accumulated, promoting a thorough clean without harsh chemicals.
Regularly using vinegar as a cleaning agent for your dryer vent not only keeps it free from clogs but also contributes to maintaining the overall efficiency of your appliance. This simple DIY method is an environmentally friendly and cost-effective way to ensure safety in your home while extending the lifespan of your dryer.
Effortless Toilet Unclogging With POPULO Electric Plunger (wherecanibuythat.us)
Conclusion and Additional Resources
In conclusion, DIY dryer vent cleaning is crucial for safety and efficiency. Regular maintenance can prevent fires and boost appliance performance. Remember, a clean dryer vent leads to a more efficient laundry day while reducing fire hazards.
With the right tools and knowledge, homeowners can master this essential home maintenance task.
FAQs: Solving Your DIY Dryer Vent Cleaning Queries
1. Why should I clean my dryer vent?
Cleaning your dryer vent is crucial for reducing fire hazards and keeping your home safe. It also helps your appliance work better.
2. What are the basic steps for DIY dryer vent cleaning?
First, unplug the dryer and move it away from the wall. Then, clean out the lint trap before vacuuming inside of the duct system. After that, you can clean both indoor and outdoor parts of the vent.
3. Can I clean my dryer vent without moving the dryer?
Yes, sometimes you can use long brushes or a vacuum extension to reach into the duct and remove lint without needing to move your dryer.
4. What tools do I need to clean my dryer vent?
You will need a vacuum with hose attachments, a brush made for cleaning vents, and some common household tools like screwdrivers if necessary. Get all the tools you need with the Sealegend Dryer Vent Cleaner Kit.
5. How often should professional cleaning be done compared to DIY methods?
Pros clean more thoroughly than typical home efforts; it’s good practice to hire them every few years. Physical removal techniques at home should be done regularly in between professional services.
6. What are the benefits of this DIY dryer vent cleaner info?
Cleaning your dryer vent regularly is not only good for your appliance but also for your health and safety. A clogged dryer vent can cause several problems, such as:
- Reduced efficiency: A dryer with a blocked vent will take longer to dry your clothes, wasting energy and money.
- Overheating: A dryer with a restricted airflow can overheat and damage its components, or even start a fire.
- Poor air quality: A dryer with a dirty vent can release lint, dust, and allergens into the air, affecting your indoor air quality and potentially triggering respiratory issues.
By cleaning your dryer vent yourself, you can avoid these issues and enjoy the benefits of a well-functioning dryer. You can also save money on professional cleaning services and reduce your environmental impact. All you need are some simple tools and a bit of time to do it yourself.
Related posts:
 Sealegend 2 Pieces Dryer Vent Cleaner Kit
 Effortless Toilet Unclogging with POPULO Electric Plunger
 RUITOOL Woodworking Japanese Hand Saw
 Discover the Perfect Kitchen Table Dimensions for Your Space!
 Rec Room Furniture Ideas for Comfort and Entertainment
 The Art of Darkness: How To Make Black Paint
 How to Choose the Best Woodworking Tools for Your Budget
 3 Best Baby Pool Floats For Safe Summer
 Life Saving Dust Collection For Small Woodworking Shops
 The Best Workbench Height for Your Woodworking Projects
 The Ultimate Guide to DIY Pontoon Boat Building (Kit & Plan)
 Avoid Mishaps: Best Way to Drain a Pool with Peace & Safety