DIY Indoor Golf Simulator: The Ultimate How To Project
DIY Indoor Golf Simulator: Step-by-Step Guide
Golf lovers, get ready to build your own indoor golf simulator right at home! A golf simulator is like your own personal digital playground where you can play golf indoors. More and more golf fans are making these cool setups in their houses.
 Before you start, learning about what makes a good simulator is important. It includes things like a special screen that captures your shots, a mat to hit the ball from, a device that tracks where the ball goes, computer programs for playing different courses, and a projector to show it all big and bright.
Knowing how to choose the right space and getting all the parts to fit nicely together matters a lot. With new tech stuff out now, anyone can make their very own custom place to practice swings or have fun games with friends without leaving home.
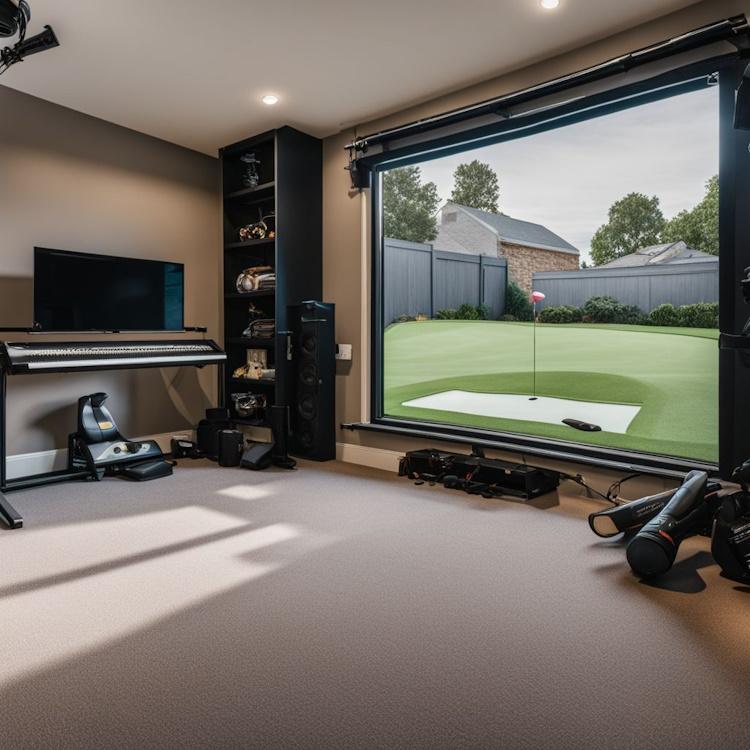
You might turn your garage into this mini-golf zone or find another spot that works great.
Planning how much money you’ll spend is key since there are choices for every budget—from simple kits to fancier equipment if you want something extra special. Once it’s set up, imagine practicing on famous golf courses around the world without flying anywhere! Keep reading; we’ll show you each step so you can tee off inside any day—rain or shine!
Key Takeaways
- You can make a golf simulator at home by setting up an enclosure with a screen, hitting mat, launch monitor, and projector.
- To build it right, you must pick a big enough space and get the area ready. This means checking for good light and making sure your floor is flat.
- The hitting mat should feel like real grass, while the launch monitor helps you see how well you hit the ball. Choose software that is easy to use and shows many different courses.
- A short-throw projector works best because it gives clear pictures even if it’s close to the screen.
- After setting up everything, check to make sure all parts work well together. Then you can have fun playing golf inside any time!
Understanding the Basics of a Golf Simulator
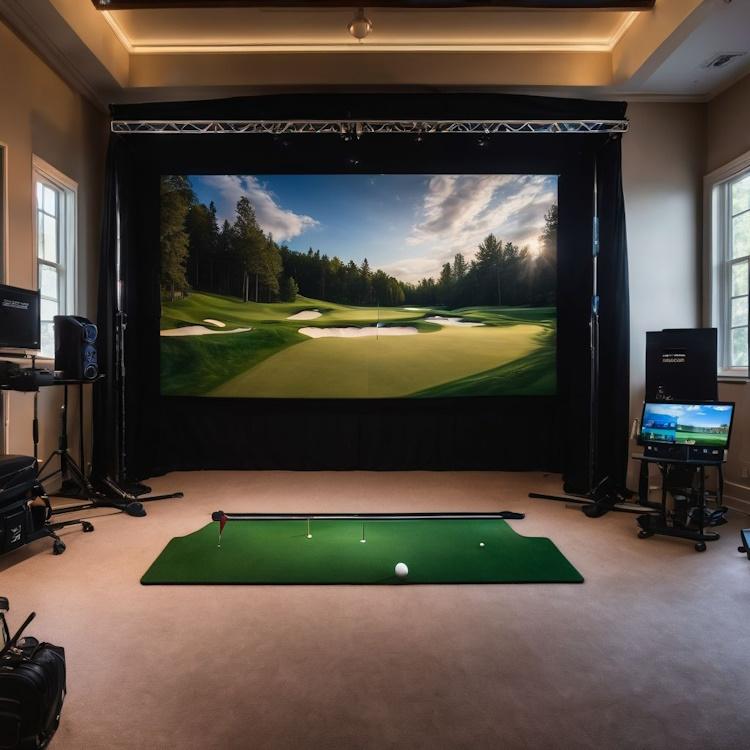
A golf simulator lets you play golf inside. You hit a real ball into a big screen that shows where the ball would go on a real course. The launch monitor watches your swing and tells the game how far and in what direction the ball should fly.
It’s like playing outside but without worrying about the weather or time.
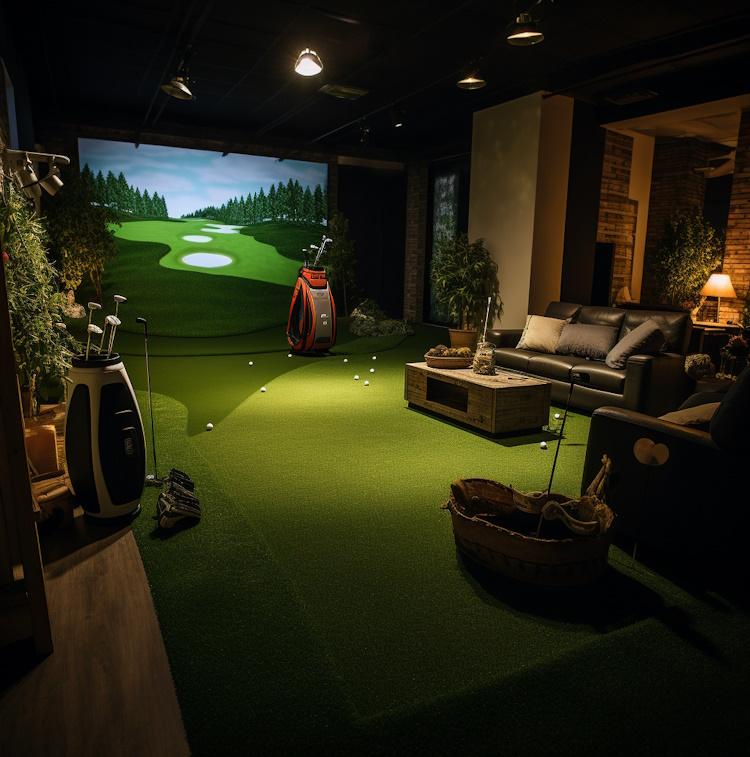
Your own home can become a fun place to improve your game or have a good time with friends. The screen is strong, so it won’t break when you hit balls into it. Computer software makes it feel like you are really out on the course, and some advanced setups let you compete against other players online!
Planning Your DIY Golf Simulator
Before you dive into building your own golf simulator, it’s important to carefully plan out the project. This includes finding the ideal space in your home, preparing the area for installation, and considering how much space you’ll need for a comfortable setup.
Understanding the Space Requirements for a DIY Indoor Golf Simulator
You need to pick a good spot for your own golf simulator. Look for a place with enough room to swing a golf club and high ceilings so you can hit the ball high. A spare room, garage, or basement can work great.
Make sure there’s ample space around you, too. You don’t want to break things or hurt anyone when hitting the golf ball.
Next up is getting that area ready for your setup.
Preparing the Area
Getting ready for your DIY golf simulator starts with preparing the space where you’ll set it up. Choose a spot in your home that has enough room for swinging a golf club.
- Measure the space to make sure it fits the screen, hitting mat, and allows for a safe swing. Your ceiling should be at least 10 feet high.
- Clear out furniture or other items that could get in the way of your swing or damage your equipment.
- Check the floor for any uneven spots. You want it level so your hitting mat lies flat.
- Look for places where you can hang an impact screen securely. The wall behind should be solid to support the weight.
- Decide if you need to add side curtains or nets to catch errant shots.
- Think about lighting. Good light is key but avoid glare on the screen or shadows on your playing area.
- Consider sound. Will hitting balls be too loud? You might need to put in some soft materials to help keep noise down.
- Plan your electrical needs. You’ll want outlets nearby for the projector and launch monitor without cords stretching across the floor.
- Ensure there’s good airflow so you won’t get too hot while playing.
Essential Components of a Golf Simulator
The essential components of a DIY golf simulator include the enclosure and screen, hitting mat, launch monitor, golf simulation software, and projector. Each component plays a crucial role in creating an immersive and realistic indoor golfing experience right in the comfort of your own home.
Enclosure and Screen
The enclosure and screen are crucial components when setting up your DIY indoor golf simulator. Look for a wide enclosure that allows you to move freely during your swings. Consider the screen material and ensure it can display clear images without sacrificing durability.
Selecting a good quality hitting area that works well with both real and foam balls is important.
For those on a budget, DIY golf simulator enclosure kits offer great options for building a cost-effective simulator at home. When choosing a screen, consider factors like aspect ratio, image quality, and screen size to ensure an immersive experience while practicing or playing virtual rounds of golf in the comfort of your own home.
 Ready to set sail on your boat-building adventure? MyBoatPlans, a comprehensive collection by Master Boat Builder Martin Reid, offers 518 plans for boats of all sizes. Dive into the world of boat construction with Martin’s 31 years of wisdom, complete with step-by-step instructions, CAD software tips, and 40+ video tutorials. Whether you’re a novice or a seasoned builder, MyBoatPlans ensures success. Start building your dream boat now! Advertisement
Hitting Mat
 After assembling the enclosure and setting up the screen, the next crucial step in building your DIY golf simulator is selecting a quality hitting mat. The hitting mat is where you take your shots from, so it needs to be durable enough to withstand repeated use while providing a realistic feel.
Look for a hitting mat that offers good shock absorption to protect your wrists and elbows and one that mimics the feel of real turf. Consider factors such as size, portability, and durability when choosing the right hitting mat for your DIY indoor golf simulator setup.
Regarding budget-friendly options without compromising quality, various hitting mats are available at home improvement stores like Home Depot or specialty online retailers.
Launch Monitor
The launch monitor is a crucial component of your DIY golf simulator, providing essential data about your ball flight, including ball speed, launch angle, and spin. It helps you understand your swing better and improve your game.
When choosing a launch monitor, consider important factors such as accuracy, ease of use, and compatibility with the golf simulation software you plan to use. Research different options like camera-based or radar-based launch monitors to find the best one for your needs.
Once you’ve decided on the right launch monitor for your DIY golf simulator project, it’s time to move on to setting up the hitting mat and ensuring that it complements the capabilities of your chosen monitor..
Golf Simulator Software

Choosing the right golf simulation software is crucial when setting up your DIY golf simulator. Look for user-friendly options that offer different courses and game improvement features.
The software should also provide realistic graphics and accurate feedback on your golf swing. Optishot, SkyTrak, Garmin Approach R10, or high-end simulators like Full Swing are good options to consider based on individual preferences and budget.
Selecting the best-suited software can greatly enhance the virtual experience of playing rounds on a golf course or honing your skills during practice sessions.
Many options are available in the market, each with its pros and cons. Some of the factors you need to consider are the compatibility, cost, graphics, features, and support of the software. In this section, we will compare and contrast some of the most popular golf simulator software programs, such as E6 Connect, TGC 2019, and OptiShot 2, and help you decide which one suits your needs and budget best.
According to the web search results, some of the features that can be compared are:
- Compatibility: This refers to the launch monitors or tracking systems that the software can work with. For example, GSPro is compatible with Uneekor and FlightScope launch monitors, while E6 Connect is compatible with SkyTrak, Mevo Plus, and others.
- Cost: This refers to the price of the software license or subscription. For example, GSPro costs $499 per year, while E6 Connect costs $300 per year for the basic package.
- Graphics: This refers to the quality and realism of the visual representation of the courses and the ball flight. For example, GSPro has 4K graphics with ultra-realistic course images, while E6 Connect has 3D graphics with enhanced lighting and shading effects.
- Courses: This refers to the number and variety of courses that the software offers. For example, GSPro has over 490 courses, most of them real-world courses, while E6 Connect has over 100 courses, including some fictional ones.
- Features: This refers to the additional modes and options that the software offers, such as practice modes, online tournaments, course designer, and analytics. For example, GSPro has a driving range, on-course practice, online connected games, and a course builder, while E6 Connect has skills challenges, peer-to-peer play, and swing analysis.
I hope this information helps you compare the features of those golf simulator programs. If you want to learn more, you can visit the software developers’ websites or read some reviews from other users.
Choosing the Right Projector for Your DIY Indoor Golf Simulator
 Selecting the right projector is essential for your DIY indoor golf simulator. Look for a short-throw projector that can display a clear, high-definition image from a short distance.
A laser projector with a good throw ratio will create an immersive experience when paired with your golf simulation software and hitting mat setup. Ensure that the projected image covers the entire screen enclosure to provide a realistic feel for your virtual golf game.
Good news – there are various options available, so you can find one within your budget while still achieving great results.
When setting up the projector, pay attention to the ambient light conditions in your selected space. Consider light fixtures or blackout curtains to optimize the visual quality of your projected golf game.
How to Build an Indoor Golf Enclosure: Tips and Tricks for a DIY Project
Assembling the enclosure and screen is the first step in building your DIY golf simulator, followed by setting up the hitting mat and installing the launch monitor. Don’t forget to carefully set up the projector and run the golf simulation software for an optimal indoor golfing experience.
Assembling the Enclosure and Screen
First, find a suitable location for your DIY golf simulator. This could be in a spare room, garage, or basement. Ensure that there is enough space for the screen and hitting area.
Setting Up the Hitting Mat
After assembling the enclosure and screen for your DIY golf simulator, the next important step is setting up the hitting mat. Here’s a breakdown of how to do it:
- Choose a high-quality golf mat that simulates the feel of real grass and can withstand regular use without damaging your flooring.
- Position the hitting mat to allow enough space for comfortable swinging and minimize any risk of hitting surrounding objects or walls.
- Ensure that the hitting mat is placed at an appropriate distance from the screen, accounting for your simulator setup’s projection and tracking capabilities.
- Secure the hitting mat in place to prevent it from shifting or moving during use, providing stability for consistent practice sessions.
- Optimize the lighting around the hitting area to minimize glare and shadows, creating a clear view of both the ball and screen for accurate feedback.
- Consider adding markings or visual aids on the hitting mat to assist with alignment and stance when practicing different types of shots.
- Integrate any additional features, such as sensors or markings on the hitting mat, if you’re using advanced simulation software that requires precise data input.
Installing the Launch Monitor
After setting up the hitting mat, the next crucial step is installing the launch monitor to ensure accurate data collection during your swing sessions. Here’s how you can accomplish this:
- Positioning: Place the launch monitor around 8-10 feet behind the hitting area for optimal data accuracy.
- Power Source: Ensure that the launch monitor is connected to a stable power source to prevent interruptions in tracking.
- Calibration: Follow the manufacturer’s instructions to calibrate the launch monitor with precision, considering factors like height and angle adjustments.
- Connectivity: Connect the launch monitor to your computer or smart device using compatible cables or wireless technology for seamless data transfer.
- Testing: Perform some test swings to verify that the launch monitor accurately captures clubhead speed, ball spin, launch angle, and other essential metrics.
- Data Interpretation: Familiarize yourself with interpreting the data provided by the launch monitor through user manuals or online resources.
Setting Up the Projector
Now that you’ve got the launch monitor in place, it’s time to focus on setting up the projector. Here’s a step-by-step guide to ensure you get the most out of your DIY indoor golf simulator:
- Choose a Short Throw Projector: Invest in a short throw projector with a high lumens rating to ensure bright and clear images on your golf simulator screen.
- Positioning the Projector: Mount the projector at a height that aligns with the hitting mat, ensuring it’s angled properly to project onto the screen without any obstruction.
- Calibrating Image Size: Adjust the projector’s throw ratio to achieve the optimal image size on your golf simulator screen for an immersive experience.
- Connecting Audio-Visual Cables: Connect the projector to your computer or gaming console using appropriate audio-visual cables for seamless integration with the golf simulation software.
- Testing and Adjusting: Turn on the projector and fine-tune its position and settings until you achieve sharp, vibrant visuals that simulate real-world golfing scenarios.
Running the Golf Simulation Software
Running the golf simulation software is crucial for simulating different courses and practicing your game. Here’s what you need to do:
- Start by ensuring that your computer meets the necessary system requirements for your chosen golf simulation software. This includes having a suitable graphics card and enough processing power.
- Install the golf simulation software on your computer according to the instructions, registering and activating the software as required.
- Familiarize yourself with the user interface of the golf simulation software, explore its features, and customize settings such as difficulty levels, course options, and game modes.
- Calibrate the software with your launch monitor to ensure accurate shot tracking and feedback during gameplay.
- Explore various features of the golf simulation software, such as virtual driving ranges, skill challenges, putting practice, or playing full rounds on different courses.
- Keep your software updated regularly to access new courses, improvements in gameplay mechanics, or added features for an enhanced experience.
- Experiment with different settings within the software to customize your virtual golfing experience based on personal preferences and practice goals.
- Utilize any software training tools or analysis features to improve your swing technique, shot accuracy, or overall performance on virtual courses.
- Take advantage of online capabilities offered by some golf simulation software to compete with other players globally or join virtual tournaments for added excitement.
- Lastly, enjoy exploring your chosen golf simulation software’s possibilities as it enhances your DIY indoor golf simulator experience.
Fine Tuning Your Golf Simulator
Fine-tuning your golf simulator is crucial to ensure an accurate and enjoyable experience. Here are the essential steps to fine-tune your DIY indoor golf simulator:
- Adjust the projector settings to optimize image quality and ensure proper alignment with the screen.
- Calibrate the launch monitor according to manufacturer instructions to accurately measure ball flight data.
- Test different lighting conditions in the space to minimize glare and enhance visibility on the screen.
- Fine-tune the software settings to customize course conditions, difficulty levels, and game preferences based on personal preferences.
- Double-check all connections between components to guarantee seamless communication and functionality during use.
- Practice using the simulator regularly to identify performance or calibration issues requiring further adjustments.
“5 Epic Man Cave Shed Ideas For Your Ultimate Hangout Spot (wherecanibuythat.us)”
Conclusion
 In conclusion, building your DIY indoor golf simulator is an exciting and rewarding project. You’ve learned about the essential components, from the enclosure to the launch monitor, and how to set them up efficiently in your space.
Have you considered the practical benefits of having a golf simulator at home? Now it’s time to take action and embark on this fun journey with confidence, knowing that you’re equipped with practical strategies for creating your own DIY indoor golf simulator.
Get ready to elevate your game and enjoy countless hours of practice and entertainment right at home!
FAQs

1. What makes building my own DIY golf simulator a good idea?
Creating your own DIY golf simulator is a great way to enjoy golf regardless of the weather outside. Plus, it can be fun and rewarding, especially for golf enthusiasts who love tackling new projects.
2. What are the first things I need for my indoor golf simulator?
The main components you’ll want to start with are a sturdy golf net, a durable hitting strip, and high-quality golf simulator screens—these pieces form the foundation of your setup.
3. Can I save money going the DIY route for my indoor golf simulator?
Yes! By choosing different components yourself – like a nylon enclosure or lamp projector – and doing the set-up on your own, you control the total cost without skimping on quality.
4. How important is it to choose one of the best launch monitors for my setup?
It’s an important consideration; camera-based launch monitors track each swing and give instant feedback on your shots—a key part of improving your game!
5. Does the weather affect how well my DIY indoor golf sim will work?
Not at all—the beauty of an indoor setup is that no matter what’s happening outside, rain or shine, you can always practice that perfect swing in comfort.
6. Where should I look if I want to find good examples or materials for building an indoor golf course at home?
Check out places like Carl’s Place — they’re known for supplying some of the best equipment and have great resources tailored just for people looking to build their very own DIY golf simulators.
Related posts:
 Trash Talk: The Perfect Kitchen Trash Can Size
 Best Ping Pong Pool Table Combo: The Ultimate Game Changer
 5 Easy Do it Yourself Basement Ceiling Ideas
 Why You Need The Best Tripod Ladder
 Top 10 Skinny Jeans: Look and Feel Your Best (2024)
 Top 10 Cheap Garage Man Cave Ideas
 How Ashwagandha Can Help You Control Your Blood Sugar Naturally
 The Art of Darkness: How To Make Black Paint
 3 Top Stainless Steel Gas Grills Review
 Best LED Lights For Your Game Room
 How to Make Your Own Boat with a DIY Boat Kit
 Discover the Secret to a Healthier Life with L-Carnitine Recipes