How To Build A DIY Wood Bathtub In 5 Easy Steps
Step-by-Step Guide to Building Your Own DIY Wood Bathtub
Why Choose A DIY Wooden Bathtub?
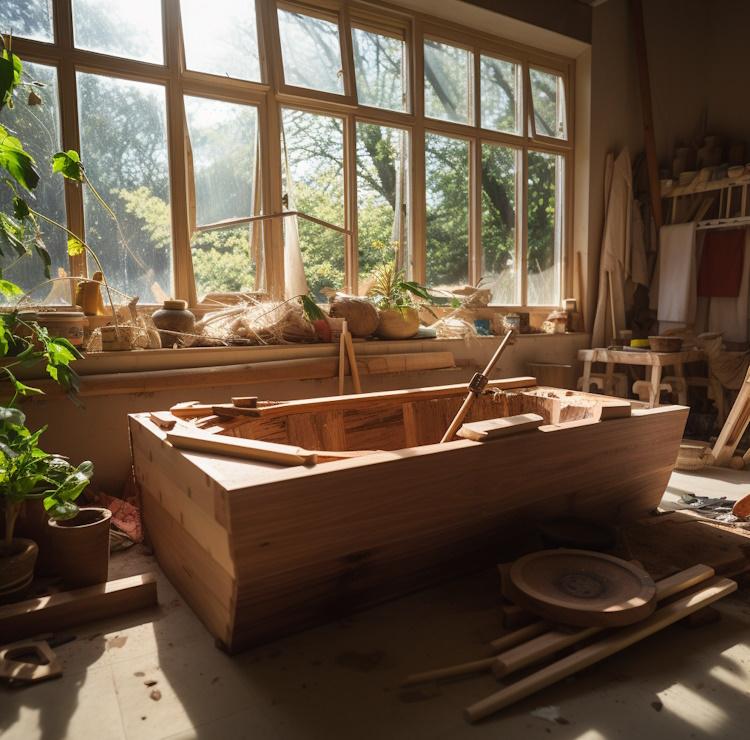
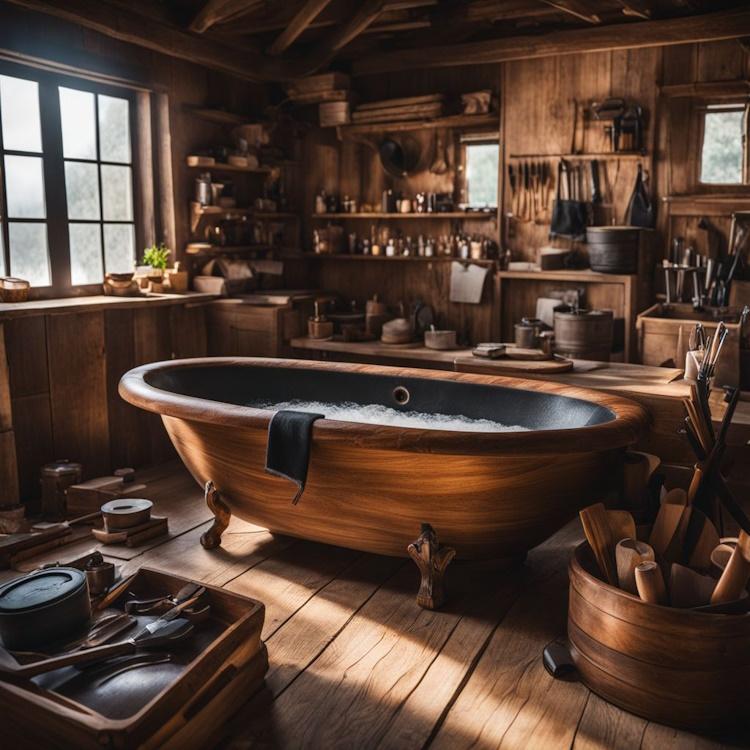
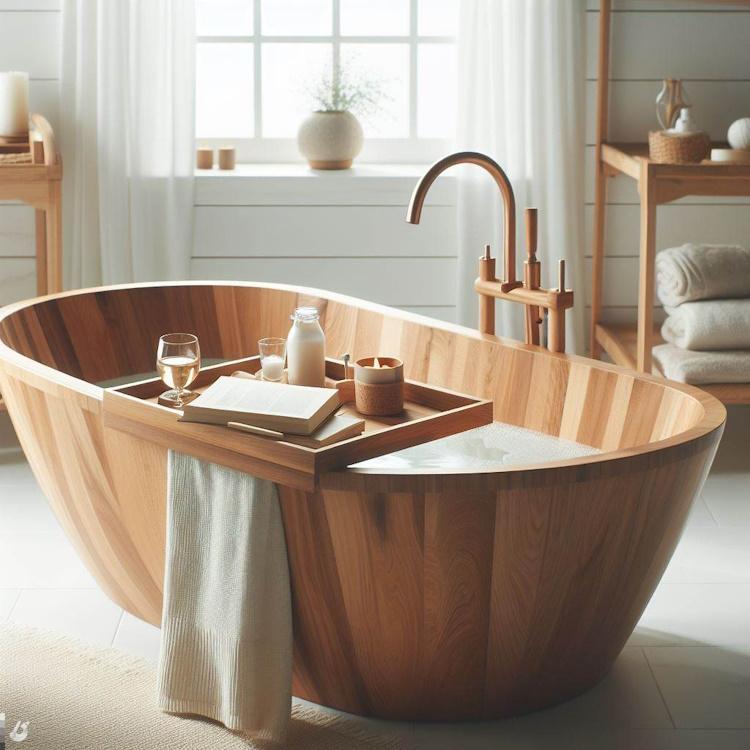
Imagine making your own wooden bathtub with a tray for your bathroom. This project lets you create something special where you can relax and keep your bath items close by. Wood bathtubs look great and feel warm when you touch them.
You can use wood that isn’t needed anymore, which saves money and helps the planet.
When picking wood, think about the type that will work best in water. The sealant is important, too, because it keeps the water from soaking into the wood. Putting together a wooden bathtub needs some steps like measuring correctly, cutting the wood smoothly, making a strong base, and putting in panels around it.
Don’t forget to put in a place for draining water and holding the faucet.
Taking care of your wooden bathtub is key to keeping it looking nice over time. Use good sealants and add gloss to make it shine. With these ideas, anyone who likes building things can make their own stylish bath space.
The next parts of this article will guide you through choosing materials, building step-by-step, and taking care of your new tub—turning any bathroom into a peaceful getaway spot at home! Let’s get started on this exciting DIY journey!
Key Takeaways
- Choose wood like cedar, teak, or mahogany for your DIY bathtub because they are strong and do well with water.
- Use a good sealant to make sure no water leaks through the wood. Pick one made for boats or wet areas.
- Measure your bathroom space carefully before cutting any wood to make sure the tub fits just right.
- Apply a gloss finish after building the tub to protect it from water and keep it looking nice.
- Check your whole bathtub often to fix any small problems before they get big.
Choosing the Right Materials for Your Wood Bathtub
When it comes to building a DIY wooden bathtub, selecting the right materials is crucial for its durability and longevity. This includes carefully choosing the type of wood and sealant that will be suitable for use in a bathroom environment.
Selecting the type of wood
Pick the right kind of wood for your DIY wood bathtub. You want something that can handle water without getting damaged. Western red cedar is a great option because it’s strong and doesn’t rot easily when it gets wet.
Teak or mahogany are also good choices—they look beautiful and last a long time in water.
Make sure to get the best pieces of wood you can find. Look for ones that don’t have cracks or big knots. These pieces will make your tub strong and keep water from leaking out. Next up, think about what keeps the water in – choosing the type of sealant!
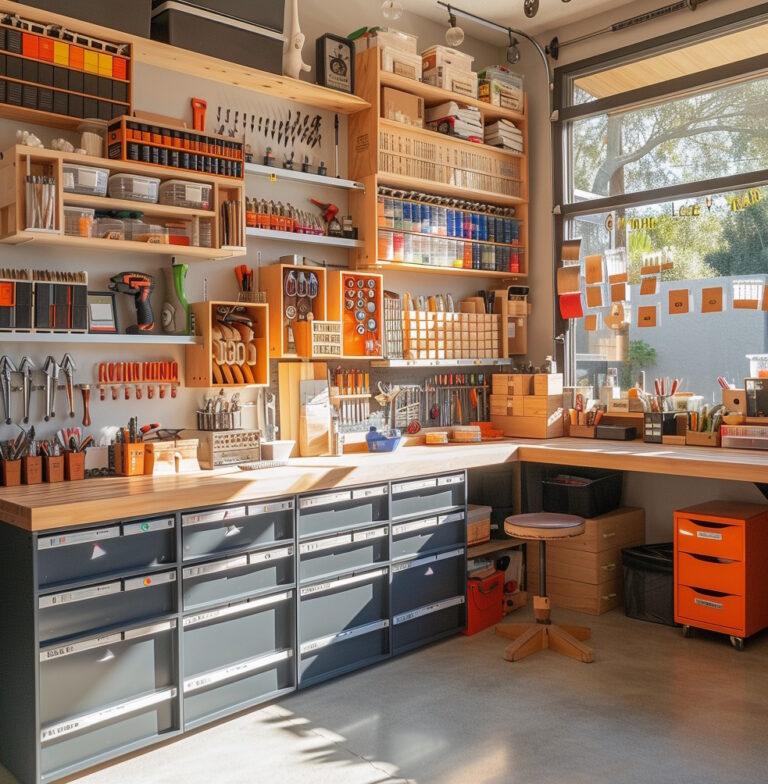
Unleash your woodworking potential with Ted’s Woodworking – the ultimate collection of 16,000 plans and projects! From step-by-step instructions to detailed schematics, it makes woodworking easy and fun. Join now for only $67 and enjoy exclusive bonuses. Act fast – this special launch offer ends soon!
Advertisement
Considering the type of sealant
Picking the right sealant for your wood bathtub is key to keeping water out and making sure your tub lasts a long time. You want something strong, like what they use on boats. This kind of sealant stops water from damaging the wood.
There are lots of products at stores like Home Depot that work well for this job.
Before putting the sealant on, ensure the wood is clean and dry. No sawdust or dirt! Then, apply the waterproof adhesive evenly with care. Let it dry completely before adding any more layers you might need.
With a good seal, your wooden bathtub will be ready to hold water without leaks and look great, too!
Now, let’s move on to measuring your bathroom area.
Step-by-step Guide to Building a Wooden Bathtub
To start building a wooden bathtub, measure the area where you want to install it and choose the type of wood and sealant that best suits your needs. Then, cut and smooth the wood, construct the base and rim, attach the wood paneling, and install the drain and faucet holder.
With careful attention to detail, you can create a beautiful and functional wooden bathtub for your bathroom.
Measuring the area
Making your own wooden bathtub is an exciting project! You need the right size to make it perfect. Here’s how to measure your space for the bathtub:
- Find a tape measure and a notebook.
- Start by measuring the length of the area where you’ll place the tub. Write this number down.
- Next, measure the width of that same space. Record this in your notebook, too.
- Check if you have enough room to walk around the tub once it’s in place.
- Decide how deep you want your tub to be for a relaxing soak.
- Jot down these measurements, as they will guide you when cutting wood later on.
How To Cut and Smooth The Wood for Your DIY Wooden Bathtub
Before you start building your wooden bathtub, cutting and smoothing the wood carefully is essential. Here’s a step-by-step guide to help you achieve a perfect finish:
- Begin by measuring the dimensions of your bathtub and marking the wood accordingly to ensure a precise fit.
- Use a miter saw to cut the wood planks or slats to the correct length, ensuring straight and even cuts.
- After cutting, use an orbital sander with fine-grit sandpaper to smooth out any rough edges and create a sleek surface.
- Pay attention to the wood grain while sanding, moving in the direction of the grain for a professional-looking result.
- Once sanded, wipe down the wood with a tack cloth to remove any lingering sawdust or debris before proceeding with assembly.
Constructing the base and the rim
After cutting and smoothing the wood, the next step is to construct the base and the rim of your wooden bathtub. Here’s a step-by-step guide to help you successfully build this part:
- Begin by assembling the base frame using strong wood glue and screws. Ensure it fits securely within the bathtub area.
- Use a level to ensure the frame is even and balanced before securing it tightly.
- Next, attach the rim by affixing it to the top of the base frame using appropriate screws or nails, providing a sturdy edge for your wooden bathtub.
- Seal any gaps or joints between the base frame and rim with wood glue to prevent water from seeping through.
- Finally, sand down any rough edges and surfaces, ensuring that everything is smooth and splinter – free for a comfortable bathing experience.
- Test the sturdiness of your construction by applying gentle pressure in various areas to ensure it can withstand regular use without any issues.
How To Attach The Wood Paneling To Your DIY Wooden Bathtub
After constructing the base and rim, the next step is attaching the wood paneling. This process involves the following steps:
- Securely place each panel: Position each wood panel on the bathtub frame with precision.
- Use clamps for stability: Employ clamps to ensure the panels are secure before fastening them in place.
- Pre-drill holes for screws: Mark and pre-drill holes on each panel to avoid splitting when inserting screws.
- Fasten panels using screws: Once holes are drilled, use appropriate length screws to attach the wood panels securely.
- Check for uniformity: Ensure that all panels are aligned evenly, maintaining a consistent and aesthetically pleasing appearance.
Installing the drain and faucet holder
To install the drain and faucet holder, follow these steps:
- Position the drain and faucet holder according to the manufacturer’s instructions, ensuring it aligns with the bathtub’s design and your preferences for accessibility.
- Secure the drain and faucet holder in place using the provided hardware, double-checking that it is tightly fastened to prevent any leaks or wobbling during use.
- Test the functionality of both the drain and faucet to ensure they operate smoothly and effectively before proceeding with further construction or finishing touches.
- Consider adding waterproof sealant around the edges of the drain and faucet holder to provide an extra layer of protection against potential water damage.
- Once installed, make sure to carefully clean up any excess sealant or debris to maintain a neat and professional appearance for your DIY wooden bathtub.
How To Maintain And Clean Your DIY Wooden Bathtub
To ensure the longevity of your DIY wooden bathtub, using a high-quality sealant and applying a gloss finish are essential. These measures will protect the wood from water damage and keep it looking beautiful for years to come.
Keep your wooden bathtub in good condition by using mild soap, avoiding harsh chemicals, and applying a fresh coat of varnish every year.
How To Seal And Varnish Your DIY Wooden Bathtub
Applying a high-quality sealant to the wooden bathtub protects it from water damage and ensures longevity. Look for a sealant specifically designed for wood, as it provides a protective barrier against moisture and helps prevent warping or cracking over time.
When sealing the bathtub, make sure to follow the manufacturer’s instructions carefully to achieve an effective and durable finish that can withstand regular use in a wet environment.
Using a top-notch sealant, you can safeguard your DIY wooden bathtub against potential water-related issues and maintain its beauty for years.
It is essential to select the right type of sealant – one suitable for wood – which creates a protective layer safeguarding the bathtub from potential water damage while maintaining its appearance.
Following the manufacturer’s guidelines when applying this sealant will ensure durability, enabling your DIY wooden bathtub to endure continuous exposure without succumbing to moisture-related problems such as warping or cracking.
Applying a gloss finish
After completing the construction of your wooden bathtub, applying a gloss finish can help protect the wood from moisture and give it a smooth, shiny appearance. Using high-quality varnish is crucial to ensure durability and water resistance.
Before applying the gloss finish, remove any sawdust or debris from the bathtub’s surface to achieve a pristine final result.
Additionally, when you apply the gloss finish, consider using epoxy resin for added protection against water damage. This will help extend the lifespan of your wooden bathtub and maintain its aesthetic appeal over time.
Conclusion
In conclusion, building a DIY wood bathtub and tray is a practical and rewarding project for your bathroom. The step-by-step guide contains easy-to-follow instructions that make the process efficient and enjoyable.
By choosing the right materials and following maintenance tips, you can ensure the longevity of your wooden bathtub. Embracing this fun project adds a personal touch to your home and allows you to create something beautiful and functional.
With woodworking knowledge and determination, anyone can successfully build their own unique wooden bathtub with a stylish tray – making it an exciting accomplishment!
FAQs
1. What’s the best wood to use for a DIY bathtub?
Pick laminated hardwood or similar sturdy wood that can handle water and last for longer periods. Special care is needed to ensure your wooden tub stands well in a wet bathroom.
2. Can I fit a wood bathtub in my small bathroom?
Yes, you can! Choose from small bathtubs or a Japanese soaking tub design – they’re perfect for tight spaces.
3. How do I start building my own bath tray?
First, measure the width of your bathtub so the tray will be a perfect fit. Then, cut your piece of wood to length and sand down any sharp corners for safety.
4. Do I need special tools for making a wooden hot tub?
A few key tools like an angle grinder, jig saw, and drill with pocket holes setup might be needed; grab these at your local hardware store to get started on fun projects like this!
5. Is there an easy way to add features like book holders on my DIY bathtub tray?
Definitely! By planning where you want these features and using bolts or gluing parts securely, you can relax with a glass of wine and read during bath time.
6. Will building my own wood hot tub save money compared to buying one?
Creating something yourself often costs less than buying pre-made freestanding tubs — plus, you earn bragging rights for doing it yourself at home!
Related posts:
 Unearthing the Best Soil pH Meter for Garden Enthusiasts and Plant Lovers
 Step-by-Step Guide to Sharpen a Japanese Kitchen Knife
 5 Epic Man Cave Shed Ideas for Your Ultimate Hangout Spot
 Smallest Recommended Bedroom Size for King Bed
 How to Make Your Own Boat with a DIY Boat Kit
 Discover the Secret to a Healthier Life with L-Carnitine Recipes
 5 Dirty Dog Lawn Weed and Crabgrass Killers (2023)
 The Best Skincare Routine for Combination Skin
 DIY Indoor Golf Simulator: The Ultimate How To Project
 15 Easy and Creative Small Scrap Wood Projects DIY for Beginners
 Make Your Dust Collection System a Reality!
 Top 10 Cheap Garage Man Cave Ideas