
Essentials of a Good Electrical Layout for Your Woodworking Shop Adventures
Essential Guide: How to Create an Efficient Electrical Layout for Your Woodworking Shop
Assigning each tool to a circuit and positioning outlets to handle your current and future layout is an important part of woodshop design.
Are you setting up a woodworking shop and scratching your head over how to manage the tangle of wires and plugs? An efficient electrical layout isn’t just about convenience; it’s crucial for safety, functionality, and keeping the creative juices flowing without disruption.
Too often, woodworkers overlook this step only to find themselves in a bind with tripped breakers or insufficient outlets. We’ll tackle this challenge together.
Did you know that each power tool in your shop should ideally have its own circuit to prevent overloading? That’s right – careful planning can make all the difference between seamless operation and frustrating power issues.
This guide will shine a light on creating an electrical blueprint that powers your passion effectively. Get ready to supercharge your workspace with our essential tips!
Key Takeaways
- Plan your shop’s electrical layout by considering the power needs of your tools and making sure each one has its own circuit.
- Put outlets where they make sense for your workflow, use GFCIs for safety, and think about future tool additions.
- Set up good lighting with overhead, task, and supplementary lights to keep your workspace safe and easy to use.
- Avoid extension cords by having enough properly placed outlets; invest in quality wiring and outlets.
- Consult an electrician to make sure your shop meets all electrical requirements and plans for possible upgrades.
The Importance of Efficient Electrical Layout for Woodworking Shops
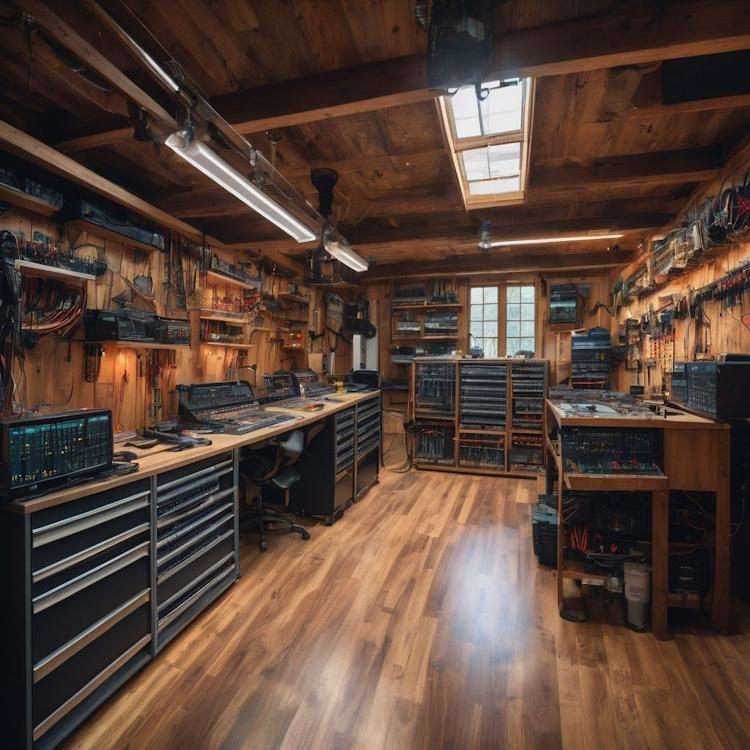
Ensuring proper power supply and organizing the space is crucial for a woodworking shop to function efficiently. Additionally, meeting safety standards is essential to create a secure working environment.
Ensuring proper power supply
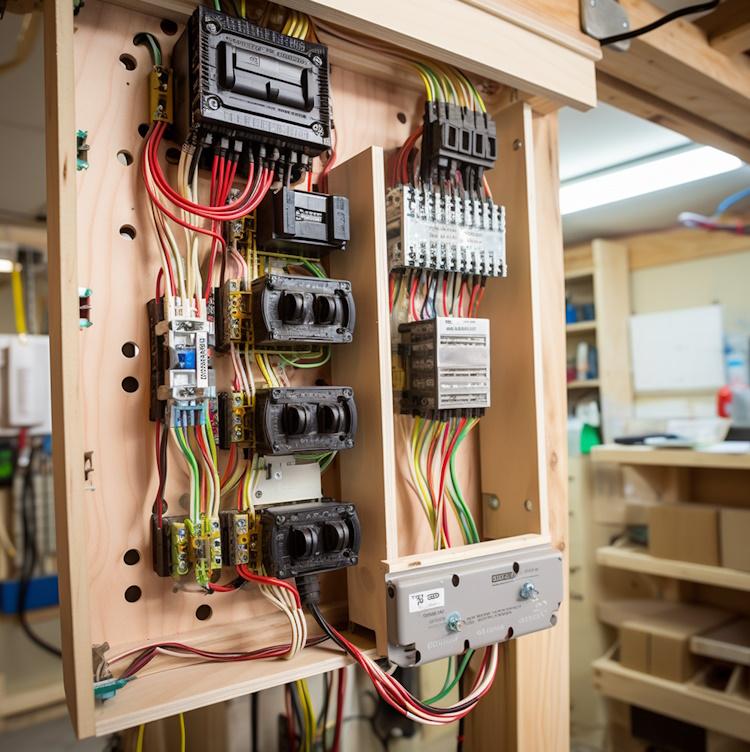
Powering your woodworking shop correctly is a must. Each heavy-duty tool needs its own circuit to work well. This stops the breakers from tripping and tools from losing power. You also want to plan for new tools you might get later on.
Adding an electrical subpanel makes it easy to manage this power distribution.
Outlets should be placed where they make sense for your workflow. Think about where each tool will go and set up outlets there—no need to use long cords that can trip someone or cut power.
Use quality wiring and outlets so that everything runs smoothly without risks or damage.
Organizing and optimizing space
Properly wiring your shop and positioning outlets is essential for handling the electrical requirements of your woodworking tools.
Positioning outlets and designing circuits to efficiently power your woodworking tools is crucial for optimizing the limited space in your shop. This allows you to avoid clutter and tangled wires, ensuring a safer and more organized working environment.
Carefully plan the location of each outlet to maximize accessibility without hindering your workspace flow, making it easier to connect equipment without creating tripping hazards or obstructing movement.
To maximize productivity in your woodworking shop, efficient use of space also requires strategic lighting design. Ensuring adequate illumination across all work areas can prevent accidents and improve precision when working with tools.
By strategically positioning fixtures, you can minimize shadows and ensure even coverage throughout the workshop area, improving visibility for intricate tasks while maintaining a well-lit environment.
Meeting safety standards
Ensure safety in your woodworking shop by using Ground Fault Circuit Interrupters (GFCIs) to protect against electrical hazards. Avoid overreliance on extension cords and invest in quality wiring and outlets for a secure electrical setup.
Remember, high-quality wiring and outlets are as important as your woodworking tools for producing top-notch workmanship.
As you prioritize safety standards, it’s essential to consider how lighting contributes to a safe working environment. Proper workshop lighting enhances visibility and plays a crucial role in accident prevention.
Steps to Create an Efficient Electrical Layout
Determine the power requirements of your woodworking tools and assign circuits accordingly. Position outlets strategically throughout the shop to ensure easy access to power when and where you need it.
Determine power requirements
To determine power requirements for your woodworking shop, consider the electrical needs of all your tools and equipment.
- Calculate the total wattage each tool requires to operate effectively.
- Ensure that the electrical circuits can handle the combined power requirements of all tools without overloading.
- Consider potential future additions to your workshop and plan for increased power demands.
- Consult with an electrician to ensure that the electrical panel can accommodate the necessary power supply.
- Take into account any special power requirements for specific equipment, such as heavy-duty machinery or specialized tools.
Assign circuits to tools
To ensure an efficient electrical layout for your woodworking shop, assigning specific circuits to different tools is crucial. This prevents overloading and ensures safety. Here’s how you can do it:
- Determine the power requirements of each tool and machinery in your woodworking shop.
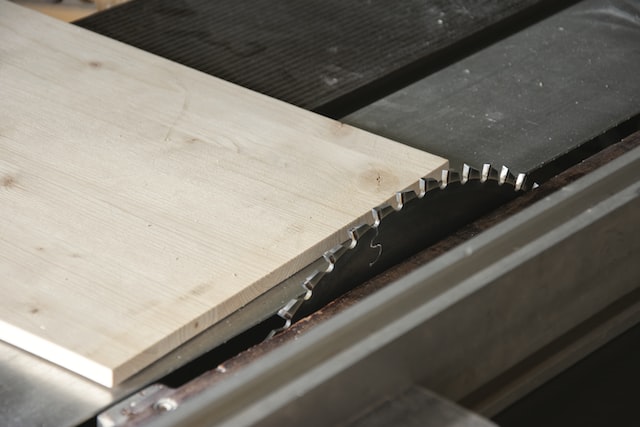
- Assign dedicated circuits to high-power tools such as table saws, planers, and jointers to avoid voltage drops or overloading.
- Consider separate circuits for smaller power tools like sanders, routers, and drills to distribute the electrical load evenly.
- Position outlets strategically near each tool to provide easy access without the need for excessive use of extension cords.
- Plan for future expansion by designing flexible circuit assignments that can accommodate new equipment or layout changes.
 Are you a woodworker with dreams of setting up a fully equipped workshop without breaking the bank? Say goodbye to the frustration of bad tools and costly mistakes with Ralph Chapman’s Ultimate Small Shop Guide. Drawing on over 20 years of woodworking experience, Chapman provides a step-by-step blueprint to help you create a functional workshop for under $1,000. Learn the secrets of tool selection, space optimization, and shop electrical layouts, and discover a hidden source for quality tools at up to 70% off big-box retailer prices. Don’t let common pitfalls derail your woodworking journey—invest in the Ultimate Small Shop Guide and start crafting your projects with confidence today! Advertisement
Position outlets strategically
After assigning circuits to tools, the next step is to strategically position outlets in your woodworking shop to ensure efficient electrical layout. Here are some key points to consider:
- Place outlets at various heights around the workshop to accommodate different types of equipment and avoid overreliance on extension cords.
- Install dedicated circuits for heavy machinery and equipment to prevent overloading and ensure consistent power supply.
- Consider installing ceiling-mounted outlets for overhead lighting and additional power sources, especially in larger workshops.
- Incorporate multiple outlets near workbenches and assembly areas to provide convenient access for handheld power tools and portable equipment.
- Utilize floor-mounted outlets strategically for stationary machinery to avoid tripping hazards while ensuring easy access for plug-in requirements.
- Plan for future expansion by installing extra outlets in strategic locations, taking into account potential changes in shop layout and equipment additions.
- Ensure that all outlets are equipped with GFCI protection to enhance electrical safety within the workshop environment.
- Label each outlet clearly according to its corresponding circuit or designated purpose for easy identification and troubleshooting when necessary.
Tips for Setting Up Efficient Shop Lighting
Determine the lighting needs of your woodworking shop, consider supplementary options, and position fixtures for optimal coverage. Read on to learn more about setting up efficient shop lighting for your woodworking space.
Determine lighting needs
Assess the amount of natural light in your woodworking shop.
Consider supplementary lighting options
When considering supplementary lighting options for your woodworking shop, keep in mind these factors:
- Determine the specific areas that require additional lighting, such as workbenches, tool storage areas, or assembly stations.
- Explore various lighting options such as under-cabinet LED lights, task lighting, or portable work lights to provide focused illumination where needed.
- Assess the flexibility of adjustable arm lamps or track lighting to direct light onto different work areas as needed.
- Incorporate natural lighting sources like windows or skylights to reduce reliance on artificial lighting during daylight hours.
- Ensure that any supplementary lighting fixtures are designed for workshop use and are durable enough to withstand the demands of a woodworking environment.
- Invest in energy-efficient LED bulbs for supplemental lighting to minimize electricity consumption and lower long-term operating costs.
- Position supplementary lighting to complement the primary overhead fixtures and fill in any shadowed areas within the workshop space.
- Evaluate the potential for task-specific lighting, such as magnifying lamps for detailed precision work or specialized color-corrected lights for finishing tasks.
- Consider motion-activated or timer-controlled supplemental lights to enhance convenience and efficiency in your woodworking shop’s overall lighting scheme.
Position fixtures for optimal coverage
When considering supplementary lighting options, it’s essential to position fixtures for optimal coverage. Here are some key points for positioning fixtures to ensure effective lighting in your woodworking shop:
- Place overhead fixtures strategically to evenly illuminate the entire workspace.
- Install task lighting directly above workbenches and machinery for focused illumination.
- Consider adjustable or directional fixtures to customize lighting based on specific tasks or areas.
- Use a combination of ambient, task, and accent lighting to create a well-lit and versatile working environment.
- Ensure that fixtures are placed at appropriate heights to avoid glare and shadows on work surfaces.
- Opt for energy-efficient LED fixtures to provide bright, long-lasting illumination while minimizing energy consumption.
Safety Measures for Electrical Layout in Woodworking Shops
When it comes to safety in your woodworking shop, using ground fault circuit interrupters (GFCIs) is crucial. Avoid relying on extension cords and invest in quality wiring and outlets to prevent electrical hazards.
Use GFCIs
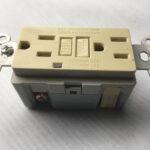 Install Ground Fault Circuit Interrupters (GFCIs) to protect against electrical shocks and prevent the risk of electrocution, especially in areas where water and electricity may come into contact.
GFCIs are crucial for woodworking shops as they detect imbalances in the electrical current and shut off power quickly, minimizing the risk of severe electric shock. With their ability to prevent fatal accidents caused by ground faults, GFCIs ensure a safer working environment.
Proper installation of GFCIs is essential for meeting safety standards and ensuring your and your tools’ protection.
Incorporating GFCIs into your woodworking shop’s electrical layout can significantly reduce the likelihood of electric shock incidents, safeguarding yourself and anyone else who uses the space.
Avoid using extension cords
 When setting up your woodworking shop’s electrical layout, it is crucial to avoid using extension cords. Extension cords can pose a safety hazard in a busy workshop and may not be able to handle the power requirements of heavy machinery.
High-quality wiring and strategically positioned outlets are essential for handling the electrical demands of woodworking tools efficiently. It’s important to plan your shop’s electrical layout thoughtfully, ensuring that each tool is assigned to its circuit and that outlets are conveniently located to prevent the need for extension cords, maintaining a safe and organized workspace.
Effective woodshop design includes implementing proper electrical measures, such as avoiding unnecessary use of extension cords. Instead, focus on strategic outlet placement and dedicated circuits for tools to ensure safety and efficiency according to your workshop’s needs.
Invest in quality wiring and outlets
Investing in quality wiring and outlets is paramount to ensure your woodworking shop’s reliable and safe operation. Quality wiring and outlets prevent hazards and support the demanding electrical requirements of your woodworking tools.
By using specialized wiring and high-quality outlets, you can maintain a consistent power supply throughout your shop, which is crucial for producing high-quality work. Additionally, employing durable components reduces the risk of electrical failures or malfunctions that could disrupt your workflow or pose safety risks to you and others in the shop.
Planning for an efficient electrical layout includes considering future expansion needs; choosing superior wiring and outlets facilitates adaptability when incorporating new equipment or making layout modifications.
Conclusion
In conclusion, creating an efficient electrical layout for your woodworking shop is crucial for ensuring proper power supply and safety. By determining power requirements, assigning circuits to tools, and strategically positioning outlets, you can optimize space and enhance productivity.
15 Tips For Optimizing Your Small Woodworking Shop (wherecanibuythat.us)
Consider lighting needs, use GFCIs, avoid extension cords, invest in quality wiring and outlets to set up a safe and well-lit workshop. With these measures in place, your woodworking shop will be primed for success and ready to support your craft with reliability and efficiency.
FAQs
1. What do I need to know about designing an electrical layout for my woodworking shop?
When you design your woodworking shop’s electrical layout, think about your workshop’s dimensions, where you’ll place electrical components, and follow electrical codes.
2. How much power will my garage workshop need?
Your garage workshop’s electrical load calculation tells you how much power it needs. This includes the total power for all tools and lights.
3. Can I upgrade my small workshop with better lighting?
Yes, you can definitely plan a lighting upgrade in your small workshop layout to help see your projects clearly and keep the space safe.
4. Will I need an electrician to install an electrical subpanel in my woodshop?
Hiring an electrician is a smart choice to make sure that the installation of an electrical subpanel in your woodshop meets safety standards.
5. What are essential factors when laying out the shop floor of a woodworking shop?
In making a good shop floor layout, consider how much space each tool needs and ensure there’s room for safely moving around with enough outlets nearby.
References for Electrical Layout in Your Woodworking Shop
Wichita State: Electrical Hazards – https://www.wichita.edu/services/environmental_health_and_safety/documents/Electrical_Safety_Training_Manual.pdf
Related posts:
 How To Set Up A Small Woodwork Shop for Under $1000 With UltimateSmallShop.com
 How to Set Up Your Woodworking Shop with the Right Tools from the Start: A Complete Guide
 Crafting Memories: How to Plan a Woodworking Shop That Will Inspire Your Soul
 Lip Flip vs Filler: Which is Best With Alternatives
 The Best Workbench Height for Your Woodworking Projects
 Buying Guide To Finding The Best Cordless Circular Saw
 Rec Room Furniture Ideas for Comfort and Entertainment
 15 Tips for Optimizing Your Small Woodworking Shop
 Classic Small Woodworking Shop Tools On A Budget
 Best LED Lights For Your Game Room
 5 Easy Do it Yourself Basement Ceiling Ideas
 General Rule of Thumb: Allocating Closet Space Per Person


4 Comments