How to Sharpen a Handsaw with a File and Accomplish More
5 Essential Steps to Sharpen a Hand Saw with a File
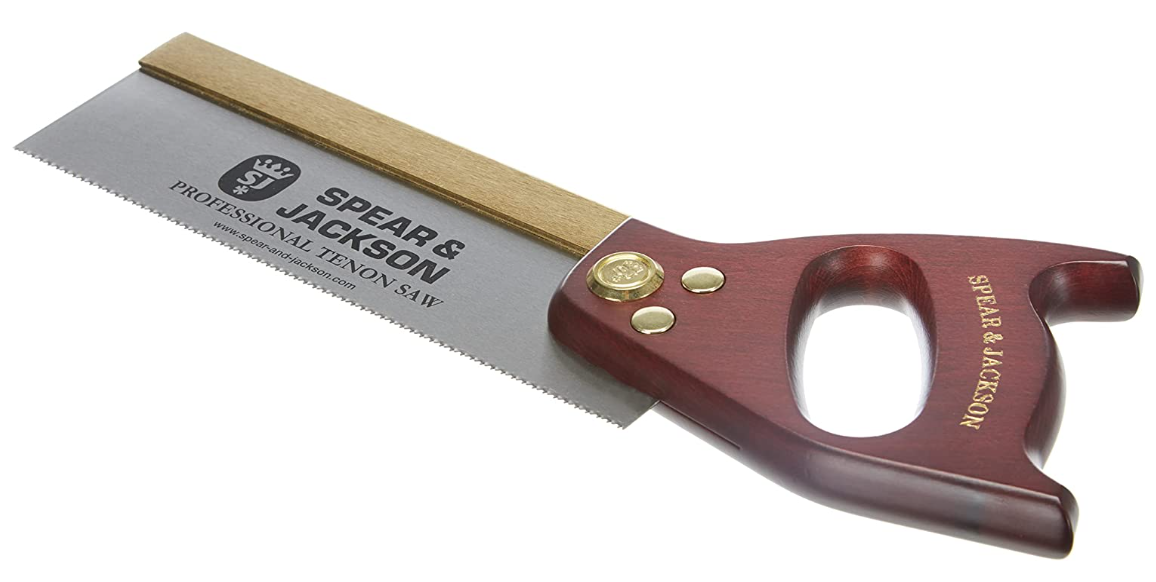
Hand saws can make cuts with precision and accuracy when the teeth on the blade (the blade is also called the plate) are sharp and shaped in the correct angles. Sharpening a hand saw is not an intuitive job. To correctly sharpen a handsaw with a file needs a little knowledge, some practice, and careful file handling to get the job done right. In this blog post, we will be covering the basics of sharpening Western hand saws. Let’s get into it!
Understand the Hand Saw Tooth Count
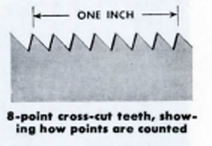 Hand saw tooth count is the number of teeth per inch on the blade, and is also known as “pitch.” Hand saws are classified by their tooth count, which can range from 4 to 32 teeth or points per inch (PPI). The tooth count determines the size of the kerf (the width of the blade’s cut) and the speed at which the saw cuts through a material. A higher tooth count will yield a finer cut, while a lower tooth count will yield a coarser cut.
The right saw for the job can help you create precise, sharp cuts with minimal effort.
Learn About Hand Saw Tooth Shape and Geometry
NOTE: Western hand saws cut on the push. That’s because of the shape and geometry of the teeth. Japanese hand saws cut on the pull and require a different technique.
Hand saw teeth are typically categorized into crosscut or rip cut teeth.
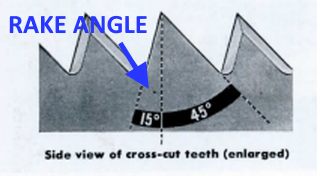
The Rake Angle
Crosscut teeth have a rake angle of 8-15 degrees and a fleam angle of 20-40 degrees. If you view a saw tooth as a pyramid, it slopes from top to bottom at 60 degrees. It’s the angle same for both crosscut and rip cut teeth. The angle on the cutting side of the tooth is the rake angle, as shown in the image below. It’s the angle from the perpendicular taken from the tip of the tooth.
The Fleam Angle
In the illustration below you can see the fleam in crosscut teeth. If you were looking down the cutting edge of a crosscut saw you see how each tooth comes to a “point”. Each point is a result of the tooth being bevel filed from each direction. The beveling is what is called fleam and makes a crosscut saw work. Since each crosscut tooth has fleam, crosscut teeth, when viewed from the edge, appear as two rows of knives. Rip cut teeth would appear flat with no valley, like the cutting edge of a chisel. Rip cut teeth have no fleam.
![]()
Another way to understand fleam is as the angle that you will point the file when sharpening each tooth. Consider the saw blade as the perpendicular. To get a fleam of 15 degrees you would angle the file 15 degrees from the saw blade to the toe while you ran it across the teeth.
Fleam angle does make a difference in the way that the saw cuts. A fleam angle of 24 degrees will cross cut through pine and other softwoods like butter. A fleam angle of 15 degrees will produce a rougher cut with a harder push, but the edge will hold longer. Some experts say that 20 degrees is best for general use. Now that you know you can experiment and make your own call.
What Do You Need to Sharpen A Hand Saw With a File?
It sounds silly, but you need a file that can do the job. Contemporary hand saw teeth are hardened to Rockwell C 60-62 for the most part. A file softer than the saw tooth you want to sharpen is not going do much other than waste your time and your money. If the file starts screeching at you while making a cut it means that edge is too dull to do the work. If all the edges are like that then toss that file in the bin. It’s done.
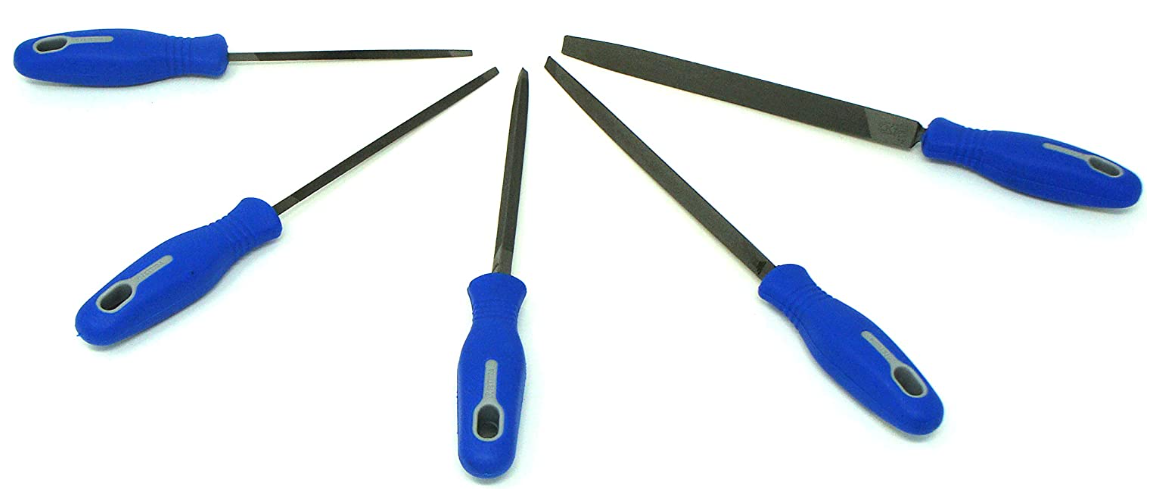
You can buy saw sharpening files individually and in sets. Files have uses other than saw sharpening so how you buy them is up to you. If you need only one file to sharpen a specific saw then you won’t go wrong with a Nicholson brand file. A hand saw file looks triangular, but it has six sides and not three. The blue-handled Tome Feteira file set in the image below is made specifically for sharpening 60 degree hand saw blades – the Western saw standard.
You need the right size file for the job. Here is a table to match up file size with the points-per-inch of the saw blade you want to sharpen.
| File Type | PPI of Saw |
|---|---|
| 8" Regular Taper | 3 - 4.5 |
| 6" Regular Taper | 5 - 5.5 |
| 7" Slim Taper | 6, 7 |
| 6" Slim Taper | 8 |
| 6" XSlim Taper | 9, 10 |
| 6" 2XSlim Taper | 11 - 13 |
| 4" 2XSlim Taper | 13 - 20 |
Files are often sold without handles. You can insert the tang into a block of wood to make a sort of field handle. You can also pick up a set of file handles online. Either way, save yourself the grief of having the file tang sticking into your palm while trying to make a smooth and precise pass.
You Need a Saw Vise to Secure the Blade
You can probably find a patented saw filing vise in an estate sale or a yard sale, if you look long enough. They were fairly common prior to WWII. A patented saw vise does one job well. It holds the saw blade securely at a comfortable height for filing.
You can fashion your own temporary saw vise with a solidly attached bench vise and a couple pieces of scrap lumber. Fit the saw blade between the wood and clamp the assembly in the vise. Leave about 1/2″ of the blade sticking up. You want just enough tooth exposure to comfortably get at them.
One requirement is that the entire blade, from handle to toe, must be clamped and secured. When you start running the file across the teeth the blade will vibrate. You can’t avoid it. Too much vibration prevents the file from biting into the metal that you’re trying to sharpen. The result is a dull saw and a dull file.
Lighting and Comfort
Filing a row of saw teeth isn’t hard labor, but it can be tedious. This is precision work. You want to file angles that are accurate and consistent to within a degree of other on each and every tooth of the saw. This kind of task is better done with good lighting.
If at all possible arrange the height of the saw vise so that you can file with your forearm at a constant 90 degree angle from your upper arm. It’s the least tiring position. You may have to go to a sitting position to get comfortable and save your back.
Jointing the Saw
Ever hear the expression “That is out of joint?” This aspect of saw sharpening is where it comes from.
Either through use (or misuse as the case may be) the saw teeth can end up at different heights. That means that the shorties are not cutting any wood. Jointing puts the shorties back into the labor force by adjusting all the teeth to the same height.
Jointing is a relatively simple task. This is all there is to it. With about 2″ of the blade sticking out above the vise, mark all the tips of the teeth with a magic marker. With a 10″ smooth cut mill file held perfectly horizontal, rub the file once across the entire length of the blade. If all the magic marker has not disappeared do it again.
After a few more swipes, if necessary, all the teeth should have a tiny flat at the top of each tooth. Your saw is properly jointed!
Filing the Saw
When you’re ready to file, position the saw in the vise with the handle to the right. The reason for this is that you want to file every other tooth, and always by making the stroke towards the toe of the saw. Whatever file size you’re using, every stroke is going to touch the tooth you’re filing and the tooth next to it. By always filing towards the toe, the best of the file cut will be on the tooth that does the actual wood cutting.
With the blade positioned in the vise, you can see that some teeth bend away from you. These are the teeth that you want to file. The correct tooth to start on may not be the first tooth next to the handle. When you complete every other tooth on the first pass, flip the saw around in the other direction and proceed the same way.
You are concerned with two angles – the rake and the fleam. The most important is the rake angle. A good rake angle for crosscut saws is 12-15 degrees. Rip saws like 0-8 degree rake. The smaller the rake angle on a rip cut the more aggressive the cut. American manufacturers like Dittson settled on a standard 8 degree rake only because it made the cut easier to start.
Paul Sellers, a woodworking guru of sorts, sharpens his rip cut saws so that the rake gets more aggressive as you move from toe to handle. This Paul Sellers video on hand sharpening a rip saw has been viewed more than 1 million times.
Filing the Rake Angle
It’s easier to understand rake angle with a picture. The image below is of a home-made rake angle guide. Imagine that you have your triangular-looking file sitting in the gullet between two teeth. The top plane of the file is parallel to the top of the guide – the UP. You set the rake angle by rotating the file the specified number of degrees towards the handle. Always rotate towards the handle to set the rake angle. The second always in this routine is to always keep the stroke horizontal and perpendicular to the blade.

Filing the Fleam Angle
The fleam angle is set by pointing the tip of the file towards the toe. The file itself is kept horizontal and perpendicular to the blade. You can set a protractor with the desired fleam angle on the table so can see it and use it for a guide. Or better yet, draw the fleam angle out with a wide marker on a heavy piece of paper and use that for your fleam angle guide.
Slide the fleam angle guide along the table as you move toward the toe. It should take only one or two swipes with a sharp file to finish a tooth.
Setting the Saw
The set of a hand saw refers to the angle at which the teeth are angled away from the blade. This angle is important because it determines how smoothly and efficiently the saw cuts through different material. A saw with a lower set will cut faster and more aggressively, while one with a higher set will cut slower but more precisely.
The set makes the blade slightly thicker on the cutting edge. That makes the kerf slightly wider than the saw blade, allowing the blade to move through the cut without binding.
What is the best set?
To figure out the best set, start with measuring the thickness of the blade just above the teeth. You will need a micrometer.
Say the blade thickness is .035 inches. A good rule of thumb is to increase the thickness of the blade by 20% (light set) for dry hardwoods and 25% to 30% (wide set) for softwoods. Setting the saw with these guidelines would increase the thickness of our example blade to .042 inches for hardwoods, and up to .046 inches for softwoods.
These are guidelines to get you started. Experiment with different sets on the kind of cuts and with kinds of lumber you will work with most often. The wood will give you all the feedback you need to set your saws without going through the blade measuring routine every time.
You need a setting tool to do this job. If you’re lucky enough to find an old Stanley X42 saw set at a flea market or yard sale, grab it. If you need one now consider the GreatNeck SS7 Saw Set Tool.
Ask two woodworkers if you should set the saw before filing the teeth, or afterwards, and you’ll get two different answers. For one thing, the saw may not need the set. If it had too much set before the filing you may have made it just right by filing some of it away.
Finishing Up and Testing the Hand Saw Sharpness
The proof is in the pudding, so they say. After jointing, filing and setting, pull out your carpenter’s square and mark a piece of wood for the type of cut you just sharpened for. Take long strokes so you test the full length of the blade. If you get through the cut with minimal effort, good job, the saw is good to go.
If the saw rattles as the toe comes out of the cut, there is too much set. Stone the edges to reduce the set a bit and make another cut. If the rattles don’t stop you will have to lightly peen each tooth to reduce the set.
Buying Guide: The Best Wood Chisels for Your Needs (wherecanibuythat.us)
If the saw drifts from the line there is one or two different problems. Either the set is more on one side than on the other, or the teeth on one side are taller than the other side. If it’s the latter the only cure is to file again. If one side is overset you can likely cure it by stoning the side that’s on the direction of the drift.
Conclusion
You don’t need many tools to sharpen a hand saw with a file. All you need is a saw vice and a file. But, the most essential thing you need to sharpen hand saws is knowledge. You must know the different saw teeth shapes and the angles at which they should be sharpened. It is also vital to know how to secure the saw blade and how to hold the file. Hopefully, this article has given you the knowledge you need to sharpen any hand saw easily!
The publisher earns affiliate commissions from Amazon for qualifying purchases. The opinions expressed about the independently selected products mentioned in this content, and any instructions or content shared are those of the publisher, not Amazon.
Related posts:
 Make Your Dust Collection System a Reality!
 Beginner’s Guide to Woodworking: How to Craft Art from Wood
 Woodworker Tool Chest: 5 Types Of Hand Saws For Woodworking
 5 Best Mini Lathe Options For Beginners
 Why Elite Woodworkers Want Japanese Wood Chisels
 6 Best Japanese Style Kitchen Knives
 Buying Guide: The Best Wood Chisels For Your Needs
 Guide to Choosing & Maintaining Best Benchtop Band Saw
 Choosing and Mastering the Best Track Saw
 15 Tips for Optimizing Your Small Woodworking Shop
 Buying Guide To Finding The Best Cordless Circular Saw
 How to Make Your Bathroom Handicap Accessible


One Comment